Things You\’ll Need
-
Protective gloves
-
Safety goggles
-
Raker file
-
Raker guide
-
Vice
-
Marker pen
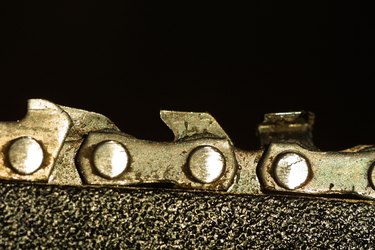 Rakers control the thickness of the chips cut by the chainsaw teeth.
Rakers, which are also known as depth gauges, need to be adjusted regularly to ensure safe chainsaw use. Rakers should be adjusted after every second or third sharpening of the chainsaw teeth. While you can take your chainsaw to a professional shop to adjust the rakers, it is possible to do it yourself with the correct tools.
Video of the Day
Step 1
Check the correct depth the raker should be set to. The depth is sometimes stamped on the raker itself. If this is not the case then consult the chainsaw manufacturer for this information.
Step 2
Clamp the chainsaw securely in a vice to prevent it from moving or slipping during the raker adjustment.
Step 3
Mark the tooth you are starting on with a pen, crayon or piece of tape. This will let you know when you have adjusted every tooth around the chain.
Step 4
Slot the raker guide tool over two opposing teeth so the tip of the raker extends out from the hole in the center of the raker guide.
Step 5
Scrape the file repeatedly across the top of the protruding raker until it no longer extends out of the gap in the raker guide.
Step 6
Remove the raker guide and file around the raker to ensure it retains a rounded shape. This prevents the raker from sticking or jamming when the chainsaw is in use.
Step 7
Rotate the chain repeating the same procedure on every raker until you come to the marker at the start.
Tip
Wear protective gloves and goggles when working with sharp tools.
Warning
Adjusting the rakers on a chainsaw below the specifications set by the manufacturer could prove dangerous and make it harder to control the chainsaw. Always check the specifications on your chainsaw before making adjustments.