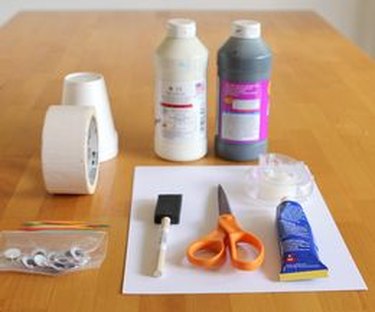
Things You\’ll Need
-
2 styrofoam cups
-
Styrofoam glue
-
Black tempera paint
-
White tempera paint
-
Sponge brush
-
Gray card stock
-
Goggly eyes
-
Scissors
-
Clear tape
-
Pen
-
White duct tape
-
Toothpicks
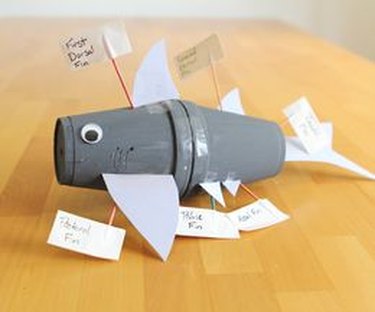 This shark model uses styrofoam cups and toothpick labels. Image Credit: Stephanie Morgan
Making a three dimensional model is a great way for kids to learn about living organisms. It gives them the opportunity to identify all of the working parts in a very hands-on fashion.
Video of the Day
This shark model is a perfect project for the beginner model maker. It's made of styrofoam cups so it's not overly complicated but still allows for lots of labeling and learning.
Instructions
Step 1
 This simple shark model uses styrofoam cups to form the body. Image Credit: Stephanie Morgan
For this project you'll need styrofoam cups, paint, tape, toothpicks, card stock and goggly eyes. Please see the last slide for an itemized list of tools and materials.
Step 2
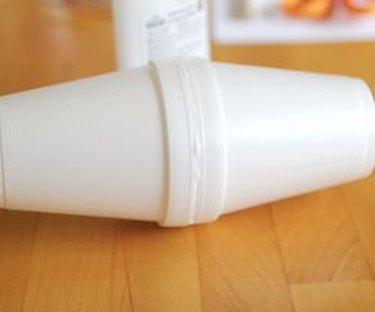 Use styrofoam glue to adhere two styrofoam cups together. Image Credit: Stephanie Morgan
Squeeze a thin line of styrofoam glue around the rim of a styrofoam cup. Press the cup together with a second cup, rim to rim, and allow the glue to dry.
Step 3
 Cut the shark\’s fins and tail out of cardstock. Image Credit: Stephanie Morgan
Draw fins and a tail onto the gray card stock and cut out the shapes with scissors. See the resources section at the end of this slideshow for a guide to the type and number of fins to make.
Step 4
 Apply gray paint to the cups using a sponge brush. Image Credit: Stephanie Morgan
Mix one part black paint with two parts white paint to create gray paint. Use a sponge brush to cover the styrofoam cups with the paint and allow to dry. Repeat this process twice for a total of three coats.
Step 5
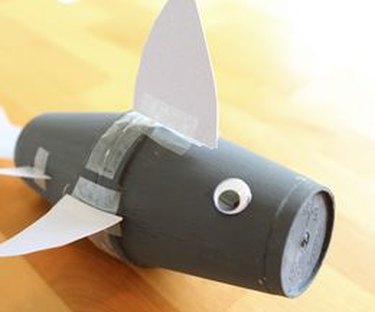 Use tape to attach the fins and tail. Image Credit: Stephanie Morgan
Attach the fins and tail to the shark body by placing a piece of tape above and below each piece. Place a small amount of styrofoam glue on the back of each goggly eye and adhere one to each side of the shark's head.
Step 6
 Add a mouth and gills using the tip of a toothpick. Image Credit: Stephanie Morgan
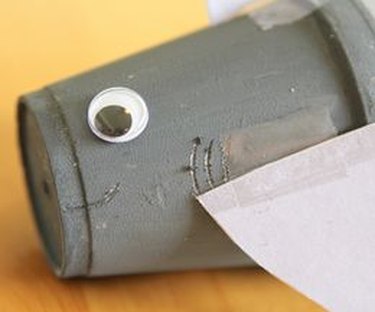
Use the tip of a toothpick to carve the mouth and gills into the shark head.
Step 7
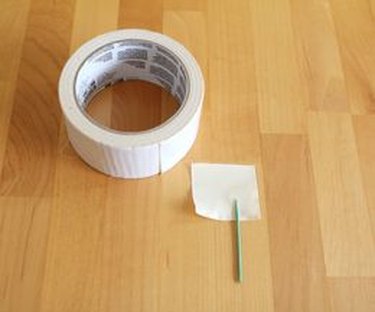 Use a toothpick and white duct tape to make labels. Image Credit: Stephanie Morgan
Tear off a one inch piece of white duct tape and center a toothpick on the sticky side, half way up. Fold the tape down over the toothpick so that the top edge meets the bottom edge.
Step 8
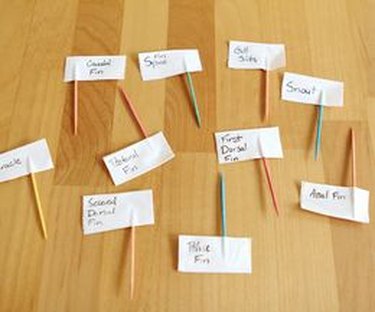 Write the parts of the shark on your labels. Image Credit: Stephanie Morgan
Repeat several times and write the names of the various shark parts on your labels. Place the toothpicks into the styrofoam shark body where they belong. Refer to the resources section at the end of this slideshow for a shark anatomy guide.