Things You\’ll Need
-
Grid paper
-
Measuring tape
-
Wooden dowels, 1 inch by 6 feet
-
Hammer
-
Fabric
-
Staple gun
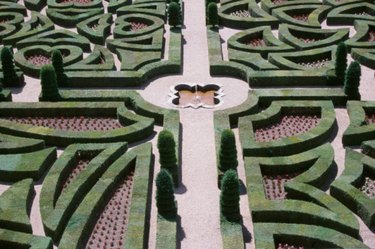 Using landscape is one way to make a walk through maze.
You can make mazes with a variety of materials, such as wood, live plants, cardboard or tarps. The first step is to plan out how much space is available for the maze, then draw out the design. Wooden mazes are better suited for quick projects like a haunted house. Crop mazes require more time to complete, due to the plants needing to grow in a tall dense crop. Walk-through mazes can have as many turns and dead ends as you like. For larger mazes, giving guests a paper version of the maze will help if they are lost. A combination of wooden dowels and fabric can make a lightweight maze that you can store for future use.
Video of the Day
Designing the Maze
Step 1
Measure and record the amount of space available to build the maze. Choose an outdoor space with dirt or grass to hammer in dowels.
Step 2
Make a basic outline of the space on grid paper. Every square of the grid will represent an even measurement. If the space is 20 by 30 feet, for example, then the outline will be 20 by 30 squares.
Step 3
Draw an entry point and exit point on the outline. Having a few different exits will make the maze a little easier to exit.
Step 4
Make a solution to the maze using the squares, saving the gridlines to act as the walls of the maze. Doing this first makes sure that there is a definite solution to the maze.
Step 5
Draw out the walls surrounding the maze solution and any other alternate paths.
Step 6
Measure each wall from the design on the grid paper. This will also tell you what you need in terms of material.
Building the Maze
Step 1
Choose a corner of the maze from which to start constructing. Choose an orientation for the maze for the best fit in the outdoor space.
Step 2
Hammer in the first wooden dowel a few inches into the soil. Choose the opening of the door to serve as the first stake.
Step 3
Measure how far the next wooden dowel will be located, in relation to the paper design, and hammer in place. You only have to place the dowels whenever a wall ends or reaches a corner.
Step 4
Drive in the remaining wooden dowels according to the paper maze design. Try to keep the dimensions as close as possible.
Step 5
Wrap the fabric around the dowels, securing with a staple gun, to form the walls. Repeat with each wall until the maze is completed.
Step 6
Clear the maze area of any trash and debris before any guests enter the maze.
Tip
Clear maze paths before going through to avoid any injury. Remove the staples to move a wall to make a different maze.